Why Start Seeds Indoors?
Starting seeds indoors is a secret weapon for gardeners eager to kick off the growing season with a bang! Not only does it give you better control over crucial factors like temperature, light, and moisture, but it also gives your crops—such as tomatoes, peppers, and herbs—a head start, allowing them to mature earlier than if you’d planted them directly outdoors. Plus, starting seeds indoors helps keep pests and diseases at bay, giving your seedlings a healthier beginning.
When to Start Seeds Indoors
Timing is everything, and knowing when to start your seeds indoors will set you up for success! The key? Determine your region’s last frost date, which tells you when it’s safe to move your seedlings outside.
- Cool-season crops like lettuce and broccoli: Start these indoors 6-8 weeks before the last frost.
- Warm-season crops like tomatoes and peppers: Start these 4-6 weeks before the last frost.
- Be sure to check your seed packets for specific planting instructions based on days to maturity.
Keep in mind, warmer climates can start earlier, while colder zones might need to wait a bit longer—but don’t worry, patience pays off!
Choosing the Best Seeds for Indoor Starting
Not all plants thrive indoors, so focus on those that will benefit from an early start:
- Vegetables: Tomatoes, peppers, eggplants, kale, cabbage
- Herbs: Basil, parsley, cilantro, thyme
- Flowers: Marigolds, petunias, zinnias
Heirloom vs. Hybrid: Heirloom seeds offer unique flavors and old-world charm, while hybrids are bred for disease resistance and higher yields. Pick based on what fits your gardening goals.
Essential Supplies for Indoor Seed Starting
To give your seedlings the best chance at success, gather the right supplies:
- Seed Starting Trays & Pots: Ensure these have drainage holes to prevent waterlogging.
- High-Quality Seed Starting Mix: A lightweight, well-aerated mix is best—avoid garden soil, as it can be too heavy and carry pests.
- Grow Lights: Full-spectrum LED lights mimic sunlight, helping prevent leggy seedlings.
- Heat Mats: These help warm up the soil, speeding up germination, especially for warm-season crops.
- Humidity Domes: These keep the air around your seedlings moist for better germination
- Plant Labels: Keep things organized by labeling your different varieties.
Soil Preparation and Proper Planting Techniques
A great start begins with the right soil. Choose a nutrient-rich, well-draining mix and avoid using garden soil (it’s too heavy and can harbor pests). Here’s how to plant:
- Fill trays with soil and leave about an inch from the top to prevent overflow when watering.
- Plant seeds at the right depth: As a general rule, plant seeds 2-3 times their diameter deep
- Mist the soil gently to keep it damp without disturbing the seeds. Use a humidity dome or plastic wrap to keep moisture levels up.
Creating the Best Conditions for Germination
Give your seedlings the best environment to grow strong:
- Temperature: Keep the soil between 65°F and 75°F (18°C to 24°C). Use heat mats for warmth-loving plants.
- Light: Once seeds emerge, provide 12-16 hours of light daily using grow lights, keeping them 2-4 inches above the seedlings
- Moisture: Keep soil evenly moist, but avoid overwatering, which can cause fungal problems like damping off.
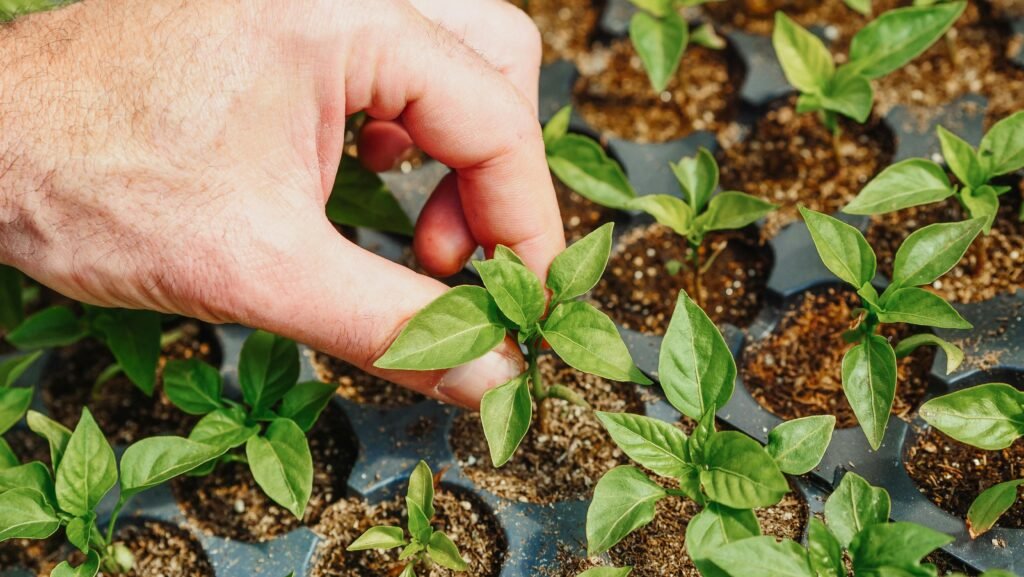
Caring for Seedlings as They Grow
As your seedlings grow, here are some tips to keep them happy and healthy:
- Water wisely: Water from below to keep the soil moist, but not soggy.
- Fertilize lightly: Once the first true leaves appear, start with a diluted organic fertilizer.
- Thin seedlings: Remove weaker seedlings to give the stronger ones room to thrive
- Monitor for disease: Ensure good airflow and avoid excess moisture to keep mold and mildew at bay.
Transplanting Seedlings Outdoors
Before your seedlings make the big move outside, make sure they’re “hardened off” by gradually exposing them to outdoor conditions:
- Start with 2 hours per day, in a sheltered spot.
- Increase exposure over 7-10 days, but avoid extreme weather
- Transplant on a mild, overcast day to reduce stress on the plants.
Planting Tips:
- Choose a well-draining, sunny spot.
- Dig holes a bit larger than the root balls to help them settle in.
- Water thoroughly and apply mulch to retain moisture and regulate soil temperature.
Common Mistakes to Avoid
To ensure your seedlings grow strong, avoid these common pitfalls:
- Overwatering: Don’t let soil become soggy—this leads to root rot and fungal diseases.
- Starting seeds too early: Avoid leggy seedlings by following the recommended planting schedule.
- Insufficient light: Window light is often not enough—use grow lights for strong, healthy growth.
- Skipping the hardening-off process: Sudden exposure to outdoor elements can shock and weaken your plants.
Starting seeds indoors is a fantastic way to give your garden a head start, ensuring a vibrant, healthy harvest. By mastering the right timing, choosing the best seeds, and providing the right care, you’ll set yourself up for a garden that’s full of flourishing vegetables, herbs, and flowers. With these steps, you’ll soon be reaping the rewards of your hard work—your thriving garden is just around the corner!
Looking for the best gardening tools and supplies? Check out our recommended gardening products to make your gardening life easier and more enjoyable!
Affiliate Links Disclaimer: This post contains affiliate links. As an Amazon Associate, I earn from qualifying purchases.